Perun moto Husqvarna 701 Luggage Rack - Installation Instructions
If your bike came without passenger grab rails installed, you need to drill the holes in the rear fairings first. Adam Chandler made a great videos about this.
Note - it is advisable to use some kind of anti-seize grease on M8 bolts going to the tank threaded inserts.
A. VIDEO INSTRUCTIONS
1. Disassembly of the bike - removing the rear fairings. Please watch entire video first, you just need to remove rear fairing and rear side fairings.
...
2.1. Installation of the rack. Another great video by Adam Chandler. Before installation, check the update, just bellow this video - it explains why we supply 4 x 2 bolts. And make sure to properly torque bolts - 10-12 Nm max. Don't use any thread locker, like Loctite 243.
...
UPDATE, October 2019 - IMPORTANT - we now supply 8 countersunk bolts - 2 x M8x50, 2 x M8x55, 2 x M8x60, 2 x M8x65.
Use M8x50 or M8x55 for rear holes and M8x60 or M8x65 for front holes.
B. INSTRUCTIONS IN PICTURES
1. Remove the gas cap. Be careful not to drop something in the tank during the installation process!
Remove the bolts marked below.

2. Remove bolts marked below, on both sides.

3. Remove rear tail plastics.

4. Remove the bolt marked below.

5. Unclip at the front and remove side fairings form the both sides.


6. Locate the markings on the underside of the plastic fairings.


7. Using step drill bit, like the one on the left (in the photo below), carefully drill the holes. Spacers are 14 mm wide, so we recommend going for approx. 16 mm wide hole.
For better precision, drill a smaller pilot hole first, using wood drill bit.


8. Reinstall side plastic fairings first. Make sure to mate align everything nicely and don't use excessive force.
Then reinstall rear top plastic and reinstall all the bolts.
Reinstall fuel cap.

9. IMPORTANT - make sure there is no debris in the threaded holes, below the plastics. You don't want the luggage rack bolts to bottom out due to debris in the holes.
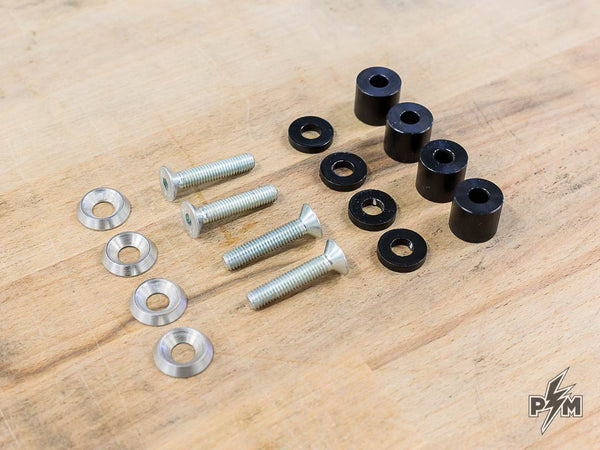
10. Prepare the rack and hardware. Use M8x55 bolts for rear holes and M8x65 for front holes. Only if these bottom out, use M8x50 and M8x60 combo instead.

11. Place the longer R14 spacers in the front holes and shorter R14 spacers in the rear holes.


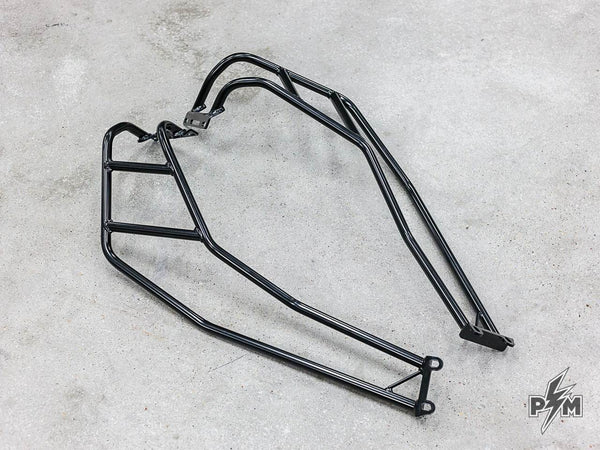
12. Place the R20 spacers between the upper and lower part of the rack and insert the bolts and 3D washers, as shown on the picture below.
Longer bolts in the front holes.

13. Place the rack as shown below and make sure everything aligns well.
You may use a drop of anti-seize in each threaded hole before installation. Do not use any kind of thread locker!
Tighten all bolts by hand and make sure everything aligns well. Then torque to 12-15 Nm, in alternating pattern.
After first several rides, re-tighten the bolts to the same spec (12-15 Nm).

---
C. INSTALLATION OF VANASCHE MOTORSPORTS MINIMALIST PANNIER RACKS V2.0
Shown with Perun moto Luggage rack already installed.
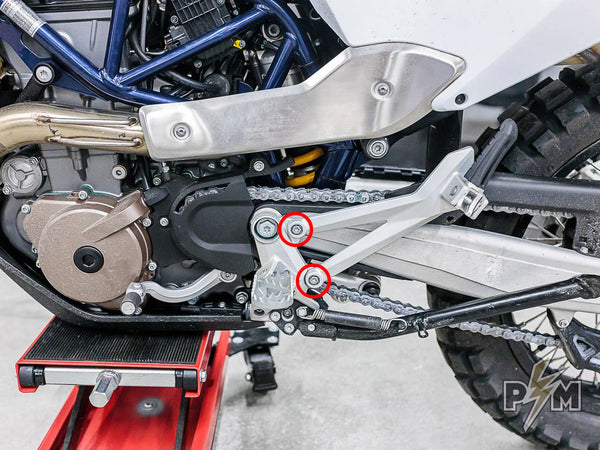
1. Remove the two bolts holding the OEM foot rest mounts or our Heel guards in place.
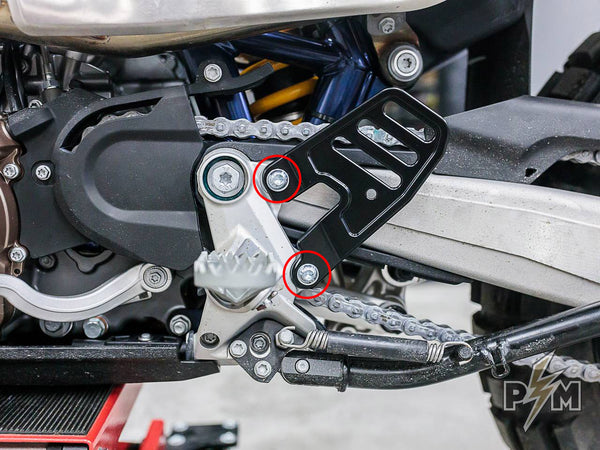
2. Remove two bolts from the Perun moto Luggage rack. Remove the two spacers which are installed between the lower and upper luggage rack plate.
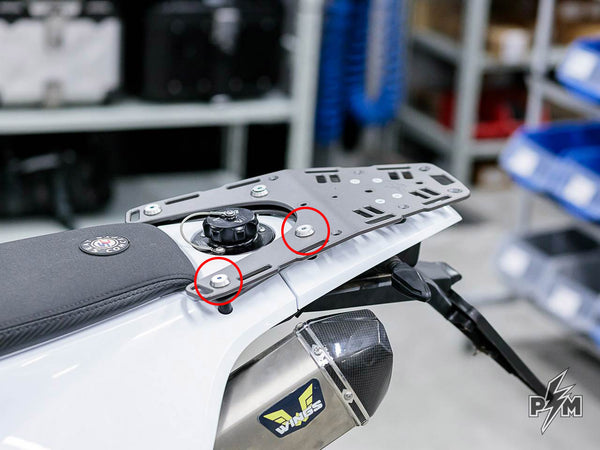
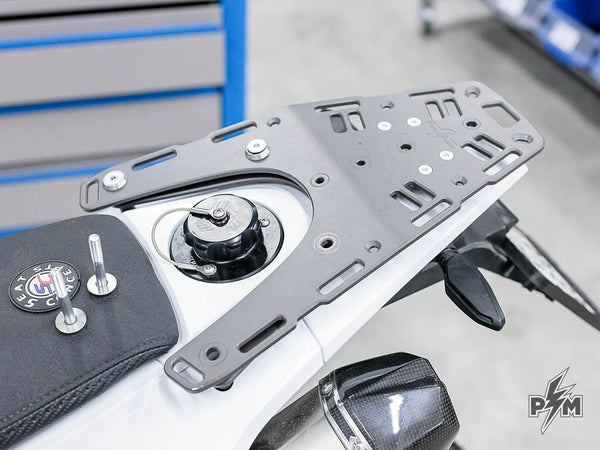
3. Install one of the lower mounting bolts and a longer spacer (as shown below) to hold the Pannier rack in place. The spacer goes toward the bike's frame. Keep this bolt loose for now so the pannier rack can move freely.
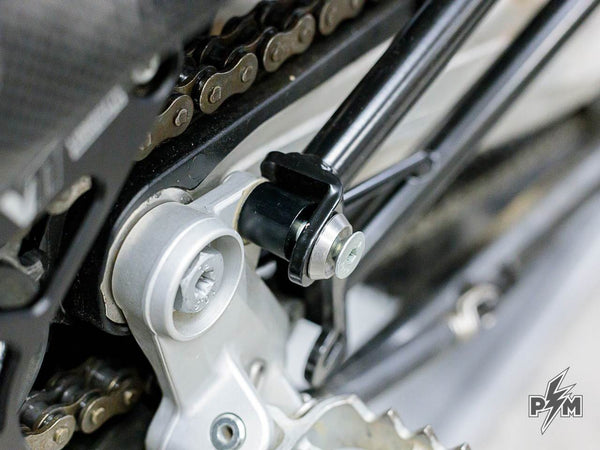
4. Place one of the shorter spacers over the upper pannier rack mount and slide both between two plates of Perun moto Luggage rack. Re-use the existing bolt. Repeat the same process for rear hole. Photos below describe this step a lot better than words do :D
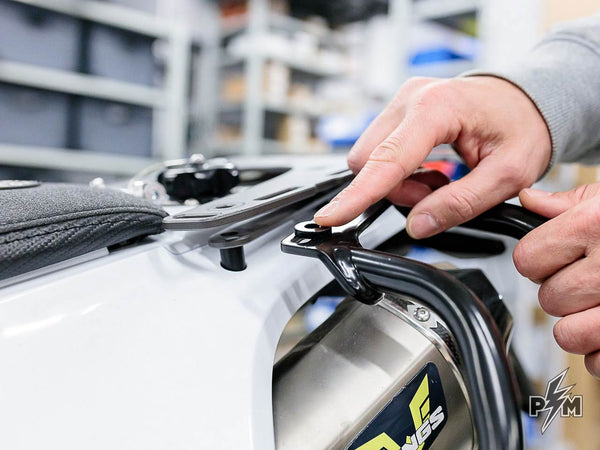
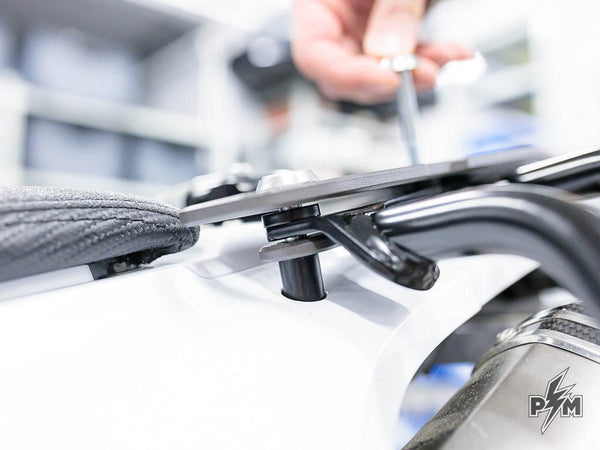
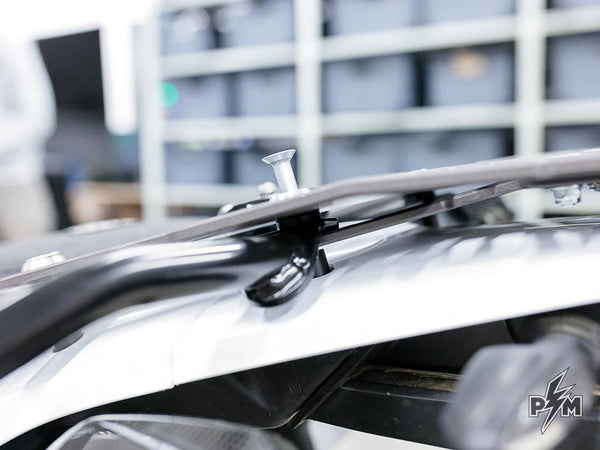
5. Install second spacer and bolt to the bottom mount.
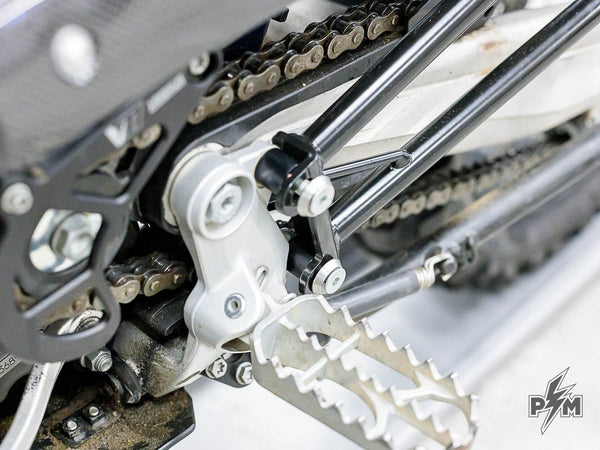
6. Check if everything aligns correctly and tighten all the bolts.
7. Repeat the same process on the other side of the bike.
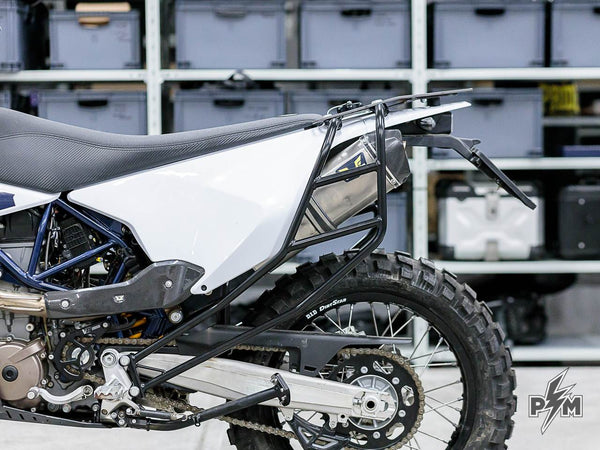
8. After couple of rides, check all the bolts and tighten if necessary.

