Perun moto Yamaha Tenere 700 Top luggage rack Gen2 - Installation Instructions
Content of the kit
- 2 x Side brackets (LHS and RHS)
- 1 x Top luggage rack plate
- 4 x 20/8.2-29 spacer
- 4 x M8x55 countersunk bolt
- 4 x M8 countersunk 3D washer
- 4 x M6x20 countersunk bolt
- 4 x M6 flat washer
- 4 x M6 safety nut


---
Step-by-step video instructions.
---
I Installation of the rack
II Installation of Givi/Kappa Monokey Top case
III Installation SW-Motech Top case
IV Installation of Rotopax fuel can
---
I Installation of the rack
1. Undo the stock bolts / luggage hooks and clear the threaded holes marked with red. Repeat on both sides.


2. Pre-assemble the Top rack on a flat surface. Insert M6x20 countersunk bolts through holes marked with green circles and align with Side supports. Use M6 flat washers and M6 safety nuts on the underside. Tighten loosely, by hand.


3. Rest the assembly on rear of the bike. Place one of the spacers between Side bracket and the bike's frame in the front. Use M8x55 countersunk bolt and M8 3D countersunk washer. Tighten by hand. Repeat on both sides.


4. Place the remaining spacers into the rear holes. To make the access easier, lift the rear end of the rack. Use M8x55 countersunk bolt and M8 3D countersunk washer. Tighten by hand.

5. Check if everything is nicely aligned, than tighten M8x55 bolts to 15Nm.

6. Tighten the M6x20 bolts to 6 - 7Nm.

7. After a few rides, check all bolts and re-tighten if needed.
---
II Installation of Givi/Kappa Monokey Top case
Road only use, 5 kg max.
Won't work with seats higher than stock.
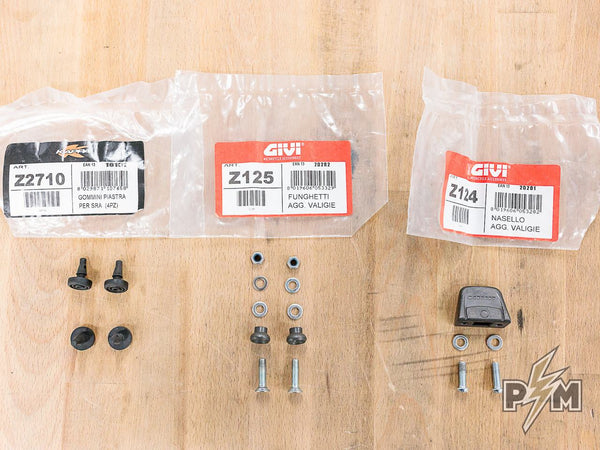
1. Following hardware is needed and it can be purchased from Givi dealers.
-
Z2710 (rubber grommets)
-
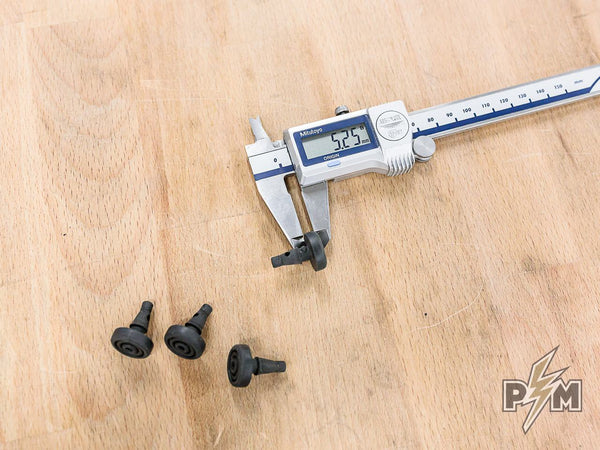
Z125 (mushroom shaped parts)
-
Z124 (pyramid shaped part)
2. Additional standard hardware is needed and it can be purchased in every hardware store. Zinc coated.
-
2 x M6x16 button head bolt,
-
2 x M6x30 countersunk bolt,
-
6 x small M6 washer,
-
2 x M6 safety nut.
...
Almost all aforementioned hardware is sold by SW-Motech too, as a kit - HERE.
Also, all aforementioned hardware, except Z2710 grommets, are sold by Givi as a kit - Givi Z2309R
3. Position the mushroom shaped parts in the marked locations.

IMPORTANT: Insert M6 small washer under each mushroom shaped part. Locate the part in the smaller circular pocket. As shown bellow.
Insert M6x30 countersunk bolt from above and use washer and safety nut on the underside.


4. Install the rear attachment clamp as shown. Cavity should face forward. Use small M6 washers and M6x16 button head bolts on the underside.


5. Insert rubber grommets as shown bellow. Make sure the rubber grommets are properly seated. Use drop of super glue to make sure grommets will stay in place.


6. Install Givi or Kappa Monokey top case. Make sure everything clicks in place. Check if top box is firm and secure.

---
III Installation of Top Luggage rack and SW-Motech Top case
Road only use, 5 kg max.
Won't work with seats higher than stock.
1. SW-Motech Adapter kit for Trax needed (purchased separately).

2. Position the mounting pucks in the marked spots.

Make sure to place the pucks into large circular pockets and tighten all bolts. Do not overtighten, as plastic covers can be deformed or cracked.

3. Install the sheet metal bracket as shown below. Use washers and safety nuts on the underside. Do not fully tighten the bolts at this time. The bracket should still be able to move slightly.


4. Install the top case and the close the top box latch. Let the sheet metal bracket find its position. Remove the top case and tighten the two bolts.


5. Install SW-Motech top case. Make sure everything clicks in place. Check if top box is firm and secure. If needed, readjust the position of sheet metal flange.

---
IV Installation of Rotopax fuel can
1. Rotopax mount is needed. Either Standard, DLX or Lox will work.
Additionally, two M8x20 countersunk bolts are needed. Check the threads on your Rotopax mount, if threads are imperial, use appropriate bolts.
2. Remove the sheet metal part from the Rotopax mount. Only billet part of the mount is needed.

3. Loosen up the front mounting bolts, on both sides.

4. Remove rear mounting bolts and raise the rack, as shown.

3. Use appropriate bolts to secure the Rotopax mount from underside of the rack. Tighten the bolts.


4. Re-install the rack. Tighten all four bolts.
5. Mount the Rotopax.
