KTM 690 Enduro Luggage Rack SD (2008-2018) - Installation Instructions
A. Luggage rack w/o Touratech pannier racks
0. If there are no grab handles installed and no holes, just remove plastic fairing and use moulded template to drill holes. Radius of spacers is 14 mm, so make 15 mm wide hole.
1. Remove grab handles. Clean the threaded inserts (the ones grab handles were bolted to). It is essential to clean debris and dirt out of threaded inserts. Dirt will prevent bolts to enter deep enough, causing rack to vibrate. Use WD 40 and blow it with air compressor (wear glasses!).

2. Insert longest spacers provided with Perun moto rack (19 mm) and align them well. Make sure no wires are pinched.

3. Rack should be preassembled, but make sure rubber elements are properly bolted.
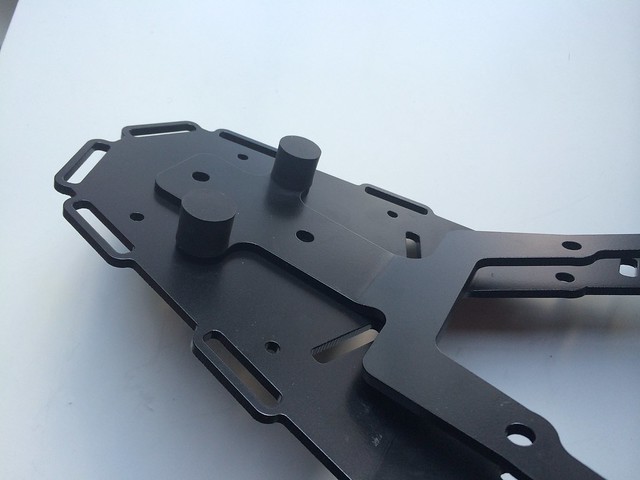
4. Position the rack and align it well. Use middle size spacers (13 mm) between upper and lower rack plate. Consider using anti seize lubricant on bolts.

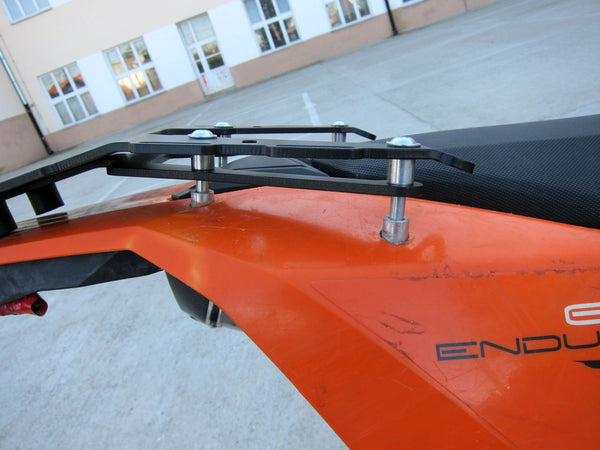
5. Tighten all bolts evenly. Don't over tighten, 15 - 20 Nm is enough. Do not go bellow this spec, as you don't want to loose bolt or two while riding. Also, don't use unnecessary force, be gentle to threaded inserts moulded to plastic tank.

6. Make sure there is no free play between bolt caps and Luggage rack - if threaded inserts are full of dirt, bolts can't enter deep enough and rack will not be secured.
B. Luggage rack and pannier racks (shown on Touratech pannier racks)
1. Loose all bolts used on TT rack, but don't remove the rack.
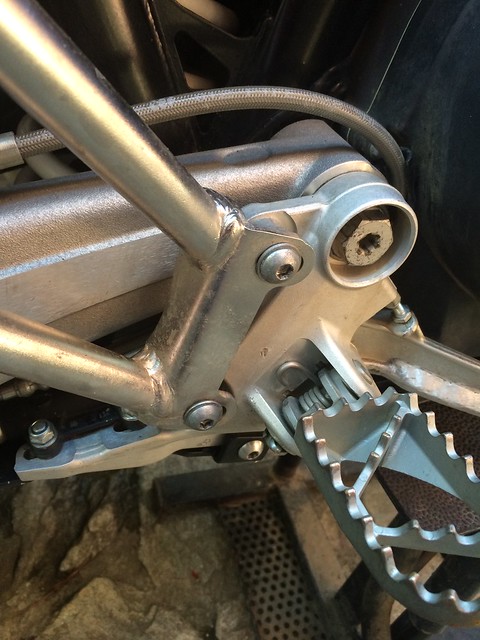
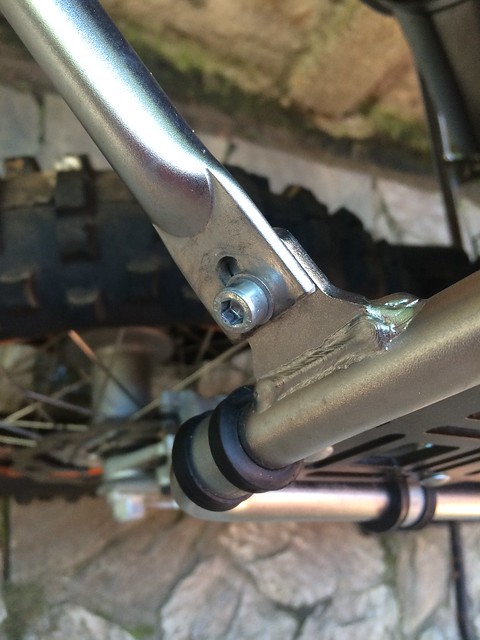
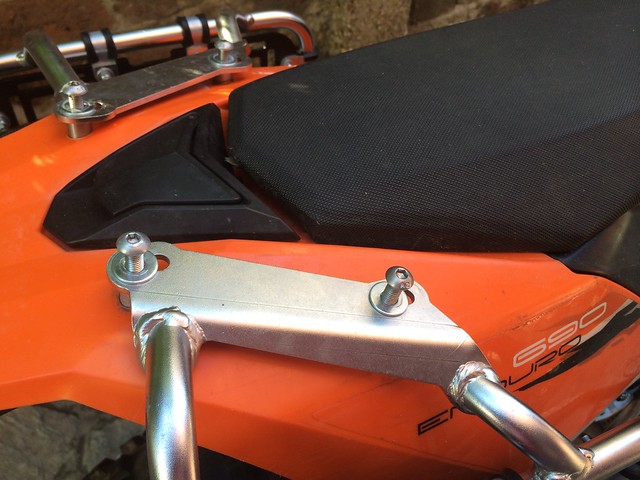
2. Remove bolts and spacers of the TT rack. Clean the threaded inserts (the ones grab handles were bolted to). It is essential to clean debris and dirt out of threaded inserts. Dirt will prevent bolts to enter deep enough, causing rack to vibrate. Use WD 40 and blow it with air compressor (wear glasses!).
1. Loose all bolts used on TT rack, but don't remove the rack.


2. Remove bolts and spacers of the TT rack. Clean the threaded inserts (the ones grab handles were bolted to). It is essential to clean debris and dirt out of threaded inserts. Dirt will prevent bolts to enter deep enough, causing rack to vibrate. Use WD 40 and blow it with air compressor (wear glasses!).
Insert longest spacers provided with Perun moto luggage rack (19 mm).
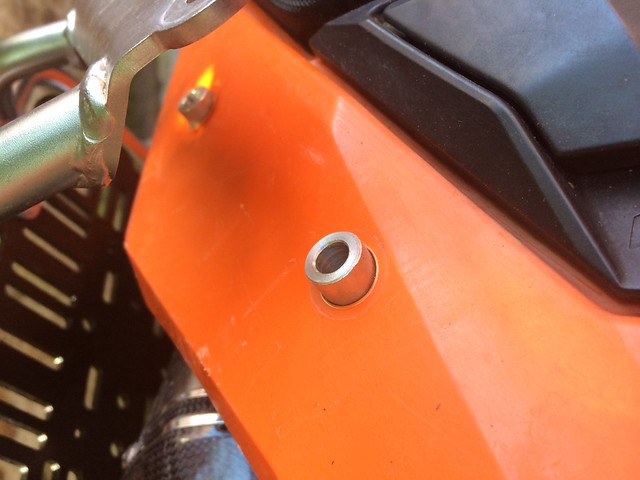
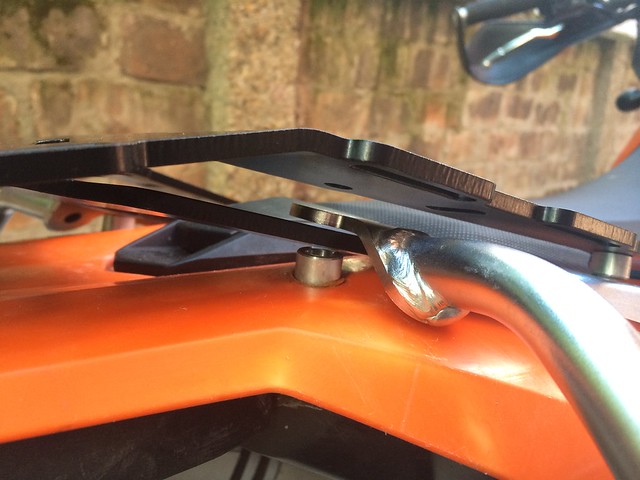
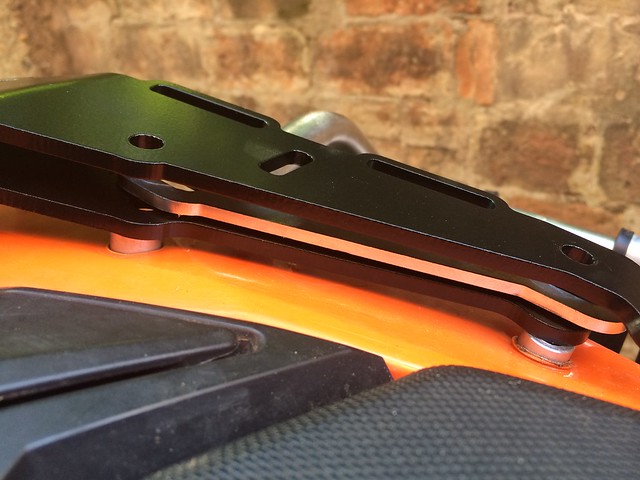
3. Align TT rack and Perun moto luggage rack, as shown in pictures.
 IMG_0383 by MaletaBG, on Flickr
4. Use shortest spacers (9 mm) between TT rack and upper plate of Perun moto rack, as shown in picture:
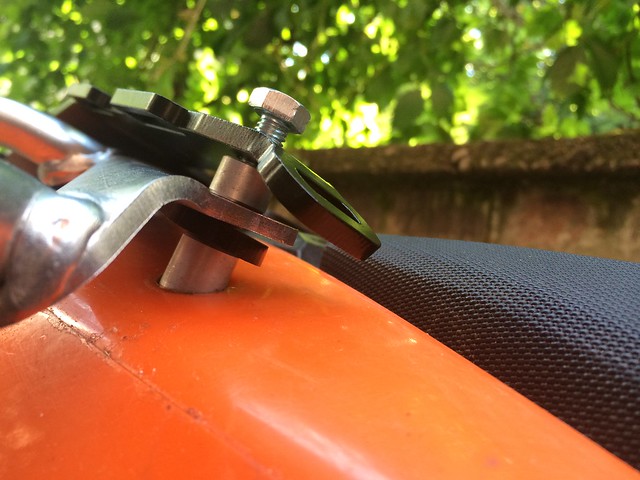
5. Insert bolts provided with Perun moto rack (instead of standard bolt used on the picture, nicer button head bolts are provided) and M8 washers. Consider using anti seize lubricant. Don't tighten the bolts yet!
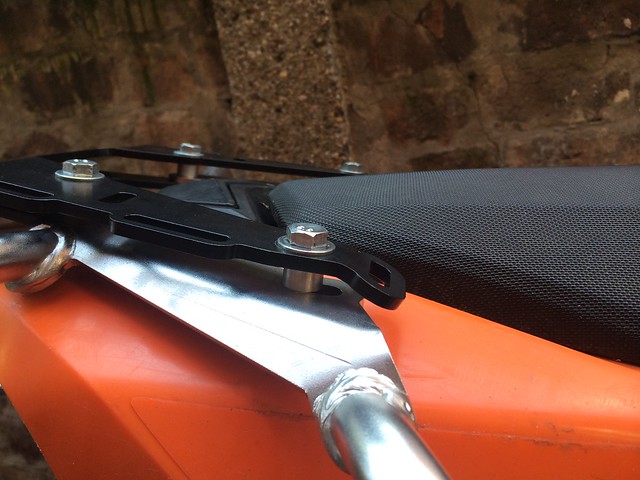
6. Tighten all bolts evenly (don't forget bolts for TT rack). Don't over tighten, 15 - 20 Nm is enough. Make sure there is no free play between bolt caps and Luggage rack - if threaded inserts are full of dirt, bolts can't enter deep enough and rack will not be secured.

3. Align TT rack and Perun moto luggage rack, as shown in pictures.

 IMG_0383 by MaletaBG, on Flickr
4. Use shortest spacers (9 mm) between TT rack and upper plate of Perun moto rack, as shown in picture:

5. Insert bolts provided with Perun moto rack (instead of standard bolt used on the picture, nicer button head bolts are provided) and M8 washers. Consider using anti seize lubricant. Don't tighten the bolts yet!

6. Tighten all bolts evenly (don't forget bolts for TT rack). Don't over tighten, 15 - 20 Nm is enough. Make sure there is no free play between bolt caps and Luggage rack - if threaded inserts are full of dirt, bolts can't enter deep enough and rack will not be secured.

C. Rotopax mount
1. Remove Luggage rack
2. Install Rotopax mount, without little circular mounting plate. Use M8 washers and M8 bolts of proper size (min. M8x25)


3. Install Luggage rack, as show in A. and B.


